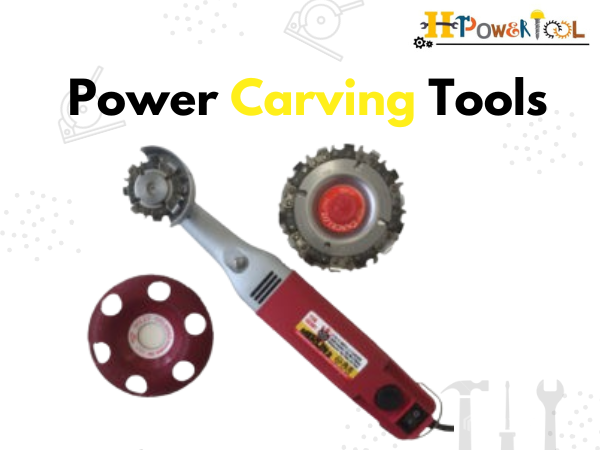
Power Carving Tools: Complete Guide for Beginners to Professionals
Auto Amazon Links: No products found.
Wood carving is one of the most satisfying creative skills—especially when you can shape raw wood into beautiful designs, patterns, and functional items. Traditional carving with hand tools is still loved by many artists, but it takes time and physical effort. That’s where power carving tools come in. They help you carve faster, cut smoother, and create detailed designs with less strain.
Whether you are a beginner trying your first small project or an experienced woodworker creating detailed sculptures, choosing the right power carving tools can completely change your results. This guide explains what power carving tools are, the different types, how they work, what to buy, and how to use them safely—without confusing technical language.
Contents
- 1 What Are Power Carving Tools?
- 2 Why Power Carving Tools Are So Popular
- 3 Main Types of Power Carving Tools
- 4 Best Attachments for Power Carving Tools
- 5 How to Choose the Right Power Carving Tools
- 6 Safety Tips for Using Power Carving Tools
- 7 Common Mistakes to Avoid
- 8 Power Carving Tool Maintenance Tips
- 9 Best Beginner Projects Using Power Carving Tools
- 10 Power Carving Tools vs Hand Carving Tools
- 11 Conclusion
What Are Power Carving Tools?
Power carving tools are electric or battery-powered tools designed to remove wood quickly and accurately. Instead of carving by hand using chisels and gouges, power tools use rotating or oscillating attachments to shape the wood.
These tools are commonly used for:
- Sculptures and 3D carving
- Relief carving (design carved into flat wood)
- Spoon and bowl carving
- Furniture detailing
- Sign carving and lettering
- Animal and human figure carving
The biggest advantage of power carving is that you can do in minutes what might take hours with hand tools.
Why Power Carving Tools Are So Popular
Power carving has grown rapidly because it’s more accessible for beginners and more efficient for professionals.
Key benefits of power carving tools
- Speed: Removes material quickly
- Less physical strain: Great for long sessions
- Better control: Modern tools offer precision
- Smooth finishing: Helps create clean shapes
- Versatility: One tool can handle multiple tasks with attachments
For people who do carving regularly, power carving tools become essential.
Main Types of Power Carving Tools
There isn’t one single tool that works for every carving job. Different power carving tools are designed for different levels of detail and wood hardness.
1) Rotary Tools (Most Popular for Beginners)
Rotary tools are small handheld machines that spin attachments at high speed. They are ideal for detailed work and light carving.
Best for:
- Fine details
- Small projects
- Carving letters
- Cleaning edges
- Decorative patterns
Rotary tools usually support many attachments like burrs, sanding drums, engraving tips, and polishing bits.
2) Angle Grinders (Best for Fast Material Removal)
Angle grinders are powerful tools mainly used for cutting metal, but with carving discs they become excellent for shaping wood.
Best for:
- Rough shaping
- Large sculptures
- Removing big chunks of wood quickly
- Bowl and dish carving
Angle grinders are aggressive, so they require good control and safety protection.
3) Power Carving Chainsaw Discs
These are special discs for grinders that look like a chain or toothed ring. They cut wood fast and can shape deep curves.
Best for:
- Deep carving
- Fast shaping
- Bowl carving
- Sculptures
These attachments are powerful but can be risky if used incorrectly.
4) Die Grinders
Die grinders are similar to rotary tools but more powerful. They often use air compressors (pneumatic) or electric motors.
Best for:
- Hardwoods
- Professional carving
- Larger burrs and shaping bits
Die grinders are commonly used in workshops for heavy carving tasks.
5) Oscillating Multi-Tools
These tools move attachments back and forth instead of spinning. They are not as common for carving, but they are useful for precise cuts.
Best for:
- Trimming edges
- Cutting small sections
- Controlled shaping
- Renovation work + carving combined
6) Reciprocating Carvers
Some power carving tools use a push-pull motion like a mini saw. They are designed specifically for carving and are easier to control.
Best for:
- Softwood carving
- General shaping
- Beginner-friendly carving
Best Attachments for Power Carving Tools
The tool matters, but the attachment decides what you can create. Here are the most useful attachments:
Carbide Burrs
Carbide burrs are strong, long-lasting carving heads used for shaping and detail work.
Best for:
- Hardwood carving
- Precise shaping
- Smooth control
Flap Sanding Wheels
These are used for smoothing curves and finishing.
Best for:
- Final shaping
- Blending edges
- Creating a clean surface
Grinding Stones
Grinding stones are cheaper but wear out faster.
Best for:
- Softwoods
- Small carving tasks
Sanding Drums
These are excellent for smoothing and finishing after rough carving.
Best for:
- Smoothing inside curves
- Removing tool marks
- Preparing for stain/paint
Carving Discs
These discs are used with angle grinders for fast shaping.
Best for:
- Large wood removal
- Sculptures
- Bowl carving
How to Choose the Right Power Carving Tools
Choosing the right power carving tools depends on your skill level and project type.
For beginners
Choose:
- Rotary tool with variable speed
- Starter burr set
- Sanding attachments
Avoid starting with aggressive grinder discs until you gain control.
For intermediate carvers
Choose:
- Rotary tool + angle grinder combination
- Carbide burrs for detail
- Flap wheels for finishing
This setup gives both speed and accuracy.
For professionals
Choose:
- High-power grinder or die grinder
- Premium carving discs
- Multiple burr sizes
- Dust extraction system
Professionals benefit from high durability and precision accessories.
Safety Tips for Using Power Carving Tools
Safety is extremely important because power carving tools move at high speed and can cause serious injury if mishandled.
Essential safety checklist
- Wear safety goggles (must)
- Use a dust mask or respirator
- Wear hearing protection
- Use tight gloves (not loose fabric gloves)
- Clamp the wood securely
- Keep your workspace clean
- Don’t wear loose clothing
Wood dust warning
Wood dust can be harmful, especially from hardwoods. Always carve in a ventilated area and clean dust properly.
Common Mistakes to Avoid
Many beginners get poor results not because of the tool, but because of mistakes.
Mistake 1: Using too much speed
High speed can burn wood and reduce control. Use medium speed for most work.
Mistake 2: Skipping rough-to-finish steps
Start with rough shaping, then medium shaping, then sanding. Don’t try to finish in one step.
Mistake 3: Not securing the wood
If the wood moves, your carving becomes uneven and unsafe.
Mistake 4: Pressing too hard
Let the tool do the work. Too much pressure reduces control and damages bits.
Power Carving Tool Maintenance Tips
Good maintenance improves tool life and carving quality.
Maintenance essentials
- Clean tool vents after use
- Remove dust from attachments
- Store burrs in a dry container
- Replace worn sanding drums
- Check power cords and battery condition
For cordless tools, keep batteries charged properly and avoid overheating.
Best Beginner Projects Using Power Carving Tools
If you’re starting, these projects build skill without being overwhelming:
- Simple wooden spoon
- Decorative wall sign
- Small animal shape (like a fish or bird)
- Relief carving on a plank
- Bowl or dish (with proper disc and practice)
These projects help you learn control, pressure, and finishing.
Power Carving Tools vs Hand Carving Tools
Both methods are valuable. The best approach is often a mix.
Power carving tools
✔ Faster
✔ Less tiring
✔ Great for shaping
✔ Efficient for large projects
Hand carving tools
✔ Better for fine traditional detail
✔ Quiet and controlled
✔ No dust and noise level issues
✔ Great for finishing touches
Many woodworkers rough-shape with power tools and finish with hand tools.
Conclusion
Power carving tools are a game changer for woodworkers, artists, and DIYers. They help you carve faster, shape smoother curves, and create professional-looking designs even if you’re new. The key is choosing the right tool for your work, using quality attachments, and following safety rules. Start with a rotary tool if you’re a beginner, and gradually move to stronger tools like angle grinders when your control improves.
With practice, patience, and the right power carving tools, you can turn simple wood pieces into beautiful artwork, signs, bowls, and sculptures.
Auto Amazon Links: No products found.
Auto Amazon Links: No products found.